
Step by Step Approach to Create a Visual Studio SharePoint Workflow (Sequential)

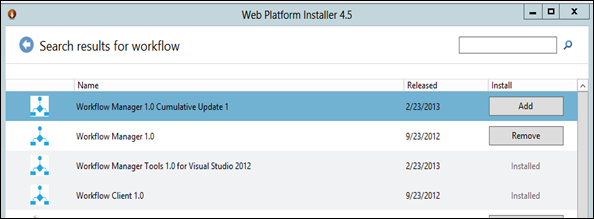
First we need to install and Configure Workflow Manger. You can install it using Web Platform Installer

image

You can find complete guide here (Prabath’s Blog).

image

image

image 

image

select the options that you need to run the workflow

  • Manual
  • Item Created
  • Item Changed

As a sample WF I’m going to get the “Age” Column in the item and Write it to log and update a column using a message.

image

Since we need to look the Age Column, i added the LookUpSPListItem to the sequence.  In the LookUpSPListItem you need to set properties to currentitem and currentlist as well as valuable you need to retrieve properties (You can change these on right side property window).

Then by clicking get properties VS generates a GetDynamicValueProperties action. In there you need to select the variable as the Source and specify properties you need to retrieve.

 image

Then drag and drop a WriteToHistory Action to the sequence. here you can go to properties and specify the message you need to log to history.

Then you can insert UpdateListItem with the Property and variable you want.

And ultimately you can deploy the workflow to your server.

image

I will put another set of posts by saying how each and every workflow actions works. This post is only touching overall process (steps) to deploy a workflow. :D

Comments

Popular posts from this blog

How to Link Two List and Create a combine view in the SharePoint 2010

In this way you can join multiple list together and can create a combine view. for an example assume that you are managing a list for some events. And also you are having a participants in separate list. Thus you want to join the two list and create a composite view. SharePoint 2010 allows you to create this kind of view using  Linked Data Source. in this approach you can create your own custom list in the SharePoint. How to Create a Linked Data source Go to SharePoint designer and  go to the link called data sources. And Click the Linked Data Source button in the ribbon. Then SharePoint designer will prompt following kind of a dialog. In there add two list, that you wan to linked together. I'm adding airline schedule and booking list. those are the two list that i wan to merge. then click next. And it will guide you another screen. it will ask you to select either Merge Merge use to combine list which are having same columns definition. for and example we can say th

Motion Eye Docker compose File

Docker compose files are comes in handy when considering container orchestration. Below example shows my docker compose files and folder structure. ---- Your Folder (motioneye)   -- etc   -- lib   -- docker-compose.yaml You can run the docker compose file using docker-compose -d , and etc and lib folder will be automatically populated in the initiation. --- Below shows the content of the docker-compose.yaml file. version: '3' services:   nodered:    image: "ccrisan/motioneye:master-amd64"    container_name: motioneye    restart: always    user: root    ports:      - 8765:8765    volumes:      - "/etc/localtime:/etc/localtime:ro"      - "./etc:/etc/motioneye"      - "./lib:/var/lib/motioneye"

How to get Username , UserID in CAML Query

If you are want to get the userID you can simple use following code. <Where>    <Eq>       <FieldRef Name='userfieldname' />       <Value Type='Integer'>            <UserID Type='Integer' />       </Value>    </Eq> </Where> in here you should declare the UserID variable before it uses. normally If you make a user filter in the SharePoint designer it will automatically create the parameter in parameter binding section in the web part. <ParameterBinding Name="UserID" Location="CAMLVariable" DefaultValue="CurrentUserName"/> But assume you want to filter using a user name and the field is not a persongroup feild and it is just a text field. then you can use following query to archive it. <Where>    <Eq>       <FieldRef Name='userfieldname' />       <Value Type=’Text’>            <UserID Type=’Text’/>       </Value>    </Eq> </Wh